HomesteadCollective.org
Main : Goatbarn


Homestead Collective Photo Gallery

Goatbarn


In 2009, we stepped up our goat infrastructure in a big way by building a proper barn in our goat pasture (previous to this we used Quonset-type huts like that seen here).

The basic concept was to build a barn that straddled our east and west goat pastures, which can be separated from each other by closing a gate. The central section of the barn is wide enough to store three round bales of hay side-by-side, and is as deep as it is wide. The main doorway was designed to be wide enough to roll a round bale through. The sides of the barn are enclosed shelters for the goats, one per pasture. Each shelter has a manger and a feed trough, both of which can be filled from the middle section, and is big enough to shelter about six goats.

Construction details can be found by clicking on the individual picures below.


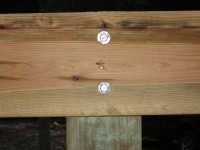
Detail of how the headers were bolted to the inner posts of the center section of the barn using washers and 4.5 inch long, 3/8 inch diameter lag bolts that were countersunk about an inch.
goatbarn_100409_n.jpg: 87 kb
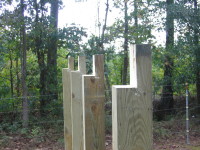
All posts for the outside walls of the side sections of the barn have been cut to exactly level height and have been mortised on the outside to accept the wall headers.
goatbarn_101009_a.jpg: 166 kb
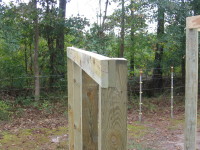
The twin-two-by-eight header is installed on the outside wall posts of the side sections of the barn.
goatbarn_101009_b.jpg: 187 kb
The twin-two-by-eight header has been installed and bolted onto the outside wall posts of the side sections of the barn using washers and 4.5 inch long, 3/8 inch diameter lag bolts that have been countersunk about an inch.  The twin-two-by-eight top-plate has been installed as well.
goatbarn_101009_c.jpg: 149 kb
Inside wiew of the header and top-plate for one of the outside walls of the side sections of the barn.
goatbarn_101009_d.jpg: 123 kb
Viewed from the north.  The headers and top-plates have been installed for the walls for the center section of the barn, and installation of the framing for the walls has commenced.
goatbarn_101009_e.jpg: 168 kb
Detail of how the headers were bolted to the posts at the corners of the center section of the barn using washers and 4.5 inch long, 3/8 inch diameter lag bolts that were countersunk about an inch.  Also shows how the two two-by-eights that formed the top-plate were overlapped at the corners.
goatbarn_101009_f.jpg: 143 kb
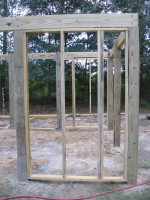
Framing for the walls, step 1.
goatbarn_100409_p.jpg: 263 kb
Framing for the walls, step 2.
goatbarn_100409_q.jpg: 236 kb
Framing for the walls, installed.
goatbarn_100409_o.jpg: 294 kb
Using two two-by-sixes to locate the centerline for the roof ridge beam, and to determine the actual angle of the two halves of the roof to verify the desired height of the ridge beam.  The left half of the roof was 14.5 degrees, and the right half was 15.0 degrees.
goatbarn_101009_g.jpg: 209 kb
Detail: dropping a plumbline to mark the centerline for the roof ridge beam.
goatbarn_101009_h.jpg: 143 kb


Click on any of the thumbnail images above to see the full-sized image.


All images on this page are (C) 2005-2019 HomesteadCollective.org and are protected by federal and international intellectual property laws. Unauthorized use is expressly forbidden.

Previous   < 1 2 3 4 5 6 >   Next


Chickens  |  Chicken Plucker  |  Easy Lean-to  |  Gamebirds  |  Goats  |  Goatbarn  |  Pets  |  Plants 


Email a link to this page to: (email addresses are not retained)

Last updated 11 December 2019.
(c) 2005-2023 HomesteadCollective.org
All images (c) 2005-2023 HomesteadCollective.org unless otherwise noted
Best viewed with CSS and JavaScript enabled.
Hosted by the The Homestead Collective.