HomesteadCollective.org
Main : Easy Lean-to


Homestead Collective Photo Gallery

Easy Lean-to


This photo collection details the construction of a simple lean-to shelter off of the back of an existing building. This shelter was originally used to shelter a horse, and has since been used as a goat shelter and to house new chickens from the time they feather out until they are adult-sized and ready to be integrated into the flock.

A free-standing side wall was built parallel to the existing wall by setting 4x4 posts in concrete and adding a 2x8 header. The rafters were notched to rest properly on the header and were then pre-attached to the nailer board. The roof assembly was positioned with the rafter notches on the header of the new wall, then lifted into place and nailed into the studs of the existing wall (later to be reinforced with lag bolts). The new wall was framed and sheathed.

Not shown: Roofing supports were added across the tops of the rafters and corrugated metal roofing was installed. A full-height back wall was added to the enclosure, which required adding another 4x4 support post midway between the new wall and the existing wall. A half-height front wall was also added, with a barn-style half-height door in its center; this required adding two half-height 4x4 support posts on either side of the door opening.


The lean-to is to be built off the back of an existing building.  View from the entrance/front of the lean-to: the site has been cleared and the four-by-four support posts have been cut to length, sunk in 18-inch-deep, 12-inch diameter holes, concreted in place, levelled and temporarily secured while the concrete sets.  The three posts on the left will form the outside wall and will support the header on which the lower edge of the roof will rest; note that the backmost of these three posts was inadventently cut long and had to be cut shorter once in place.  The fourth post (rightmost) will form the back wall and will help support the roof at its midpoint.
leanto_021107_a.jpg: 213 kb
The lean-to is to be built off the back of an existing building.  View from the short side of the lean-to: the site has been cleared and the four-by-four support posts have been cut to length, sunk in 18-inch-deep, 12-inch diameter holes, concreted in place, levelled and temporarily secured while the concrete sets.  The three front posts will form the shorter outside wall and will support the header on which the lower edge of the roof will rest; note that the leftmost of these three posts was inadventently cut long and had to be cut shorter once in place.  The fourth post (back left) will form the back wall and will help support the roof at its midpoint.
leanto_021107_b.jpg: 189 kb
The overlong support post on the outside wall has been cut to the proper length and a two-by-six header has been levelled and nailed across the inside of the support posts for the outside wall; this header will later be secured with lag bolts and washers.  The roof substructure has been built and has been positioned prior to being lifted into place.  This substructure consists of another two-by-six header and six rafters.  The "top" end of each rafter has been cut to an angle based on the desired pitch of the roof and the "bottom" end of each rafter has been birds-eye-cut to seat on the header of the outside wall, and all of the rafters have been pre-attached to the header that will be attached to the inside wall.
leanto_021107_c.jpg: 207 kb
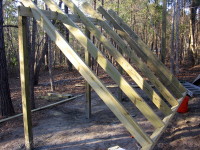
View from the entrance/front of the lean-to: the roof substructure has been lifted into place and braced temporarily.  Once it is leveled and positioned properly, it will be attached to the inside wall with nails and lag bolts with washers.  Then, the loose "lower" ends of the rafters will be positioned and spaced properly and then secured to the outside wall header with nails.
leanto_021107_d.jpg: 164 kb
View from the entrance/front of the lean-to: the roof substructure has been lifted into place and braced temporarily.  Once it is leveled and positioned properly, it will be attached to the inside wall with nails and lag bolts with washers.  Then, the loose "lower" ends of the rafters will be positioned and spaced properly and then secured to the outside wall header with nails.
leanto_021107_e.jpg: 186 kb
Detail view of the outside-wall/roof juncture. One of the metal roofing panels can be seen to the left.
leanto_021207_c.jpg: 131 kb
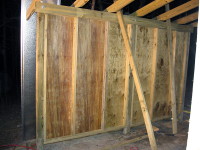
View from the entrance/front of the lean-to: the roof substructure has been secured and the outside wall has been framed and sheathed.  The back wall will be framed and sheathed as well, and the front/entrance will be secured by a half-height wall with a  custom barn-style door (see Goatbarn section) in its center.  One-by-fours will be nailed across the rafters as roofing supports, and metal roofing panels will be attached to the roofing supports with self-tapping roofing screws and washers.
leanto_021207_a.jpg: 141 kb
View of the framing of the outside wall. Note that the header has been further secured with lag bolts and washers. One of the metal roofing panels can be seen to the left.
leanto_021207_b.jpg: 148 kb


Click on any of the thumbnail images above to see the full-sized image.


All images on this page are (C) 2005-2019 HomesteadCollective.org and are protected by federal and international intellectual property laws. Unauthorized use is expressly forbidden.

Chickens  |  Chicken Plucker  |  Easy Lean-to  |  Gamebirds  |  Goats  |  Goatbarn  |  Pets  |  Plants 


Email a link to this page to: (email addresses are not retained)

Last updated 11 December 2019.
(c) 2005-2023 HomesteadCollective.org
All images (c) 2005-2023 HomesteadCollective.org unless otherwise noted
Best viewed with CSS and JavaScript enabled.
Hosted by the The Homestead Collective.